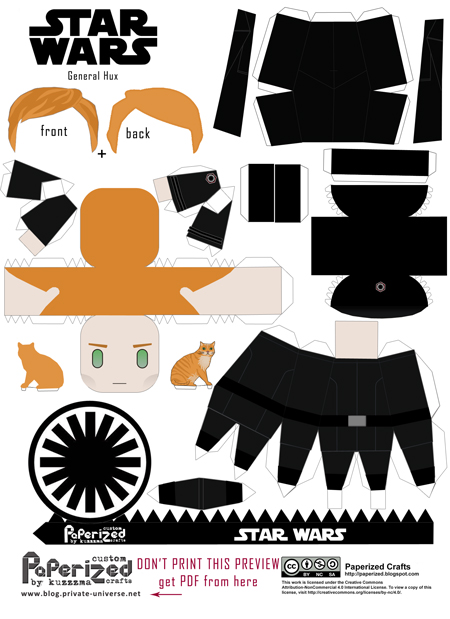
Paperized Star Wars General Hux (& Millie) paper toy.
Original pattern by: Paulo of Paperized Crafts
Custom model by: kuzzzma
Difficulty / Сложность: ★★☆☆☆ (2/5)
Paper / Бумага: 80-160gsm, 120gsm is best
Time / Время: 1 hour / час
Notes: I’ve modified original Paperized pattern for more streamlined assembly – rearranged some flaps, added extra body piece – as a “body gap” in original always bugged me. Also hands construction was changed a bit (for same reason). Template version 2.0 uses new head.
DON’T REPOST PDF, please link with preview only!
General Hux of the First Order is one of the main antagonists of the Sequel trilogy. Cunning, ruthless and efficient, he has is jockeying for the ultimate position of authority in his organization and, later, the Galaxy. He is played by Domnhall Gleeson.

General Hux (& Millie) paper toy
Download:
Photos:


How-to build

How-to assemble: Star Wars papertoys Instructions

Hey, I have a doubt in the assembly of the general hux. I don’t understand what the black piece that is under the extra body part is for. Sorry for my English and thank you for the attention.
What you mean is probably the back of his coat.
I’ve added a little how-to image to this post with extra instructions, hope it will help.