It is a truth universally acknowledged, that a you can’t leave Kaweco metal tin empty, it begs to be used to hold something. As soon as I got my Kaweco x Tokyobike pen, I started to look what to put there and obviously, your consideration starts with pens.
It’s originally a case for a pen, right?
But it’s a case for a particularly small pen, so what else can fit there?
Apparently, Pilot Prera (which is a smaller pen) fits perfectly and you can fit 3 of those in one case. I was over the moon with this discovery, as Pilot Prera are one of my favourits for writing on the go and while I can fit one into the pen loop of my Van Der Spek planner, a pen case for several + handful of accessories would be just the thing.
Kaweco tin box is metal, so it would require some padding for safekeeping my lovely solid-colour Preras.
I’ve decided to make padded inserts myself, it’s a quick and easy project, how-to with photos is available below for anyone interested.
How-to make a pen case out of Kaweco metal tin
I wanted to make removable padded inserts for several reasons:
- Ease of clean-up in case of spills etc
- In case I need this tin for anything else
Most of my craft supplies are still packed after my recent move, so I’ve used what materials were readily available to me.
Step 1: Inserts stiffener

Trace tin box onto a chosen insert stiffener with pen/pencil.
Cut it out and trim until insert fits snuggly into tin box.
It should still be easy to remove and have some allowance for cloth thickness.
I’ve used thin cardboard, but if you want your inserts to be washable – use some thin plastic or thick felt?


When fitting inserts stiffeners of your choice – check if box will close with top one inserted.
It’s a very tight fit, so my cardboard one prevented box from closing.
I’ve decided to switch to heavy photo paper (with ~160gsm thickness) for top half and forego padding there.
Step 2: Inserts padding

Padding can be made from variety of materials – there are various specialized sewing and crafting materials, I’ve used a packaging foam left over from my move.
Same principle – trace insert onto the padding, cut it out.
I’ve glued padding foam onto bottom insert with simple liquid glue.
Depending on materials used – you might have to use specialized glue instead (or choose other options).


Step 3: Cloth cover
Now it’s time to make those inserts pretty.
I don’t have my stash of sewing fabrics unpacked, so my choices were limited to easily accessible ones.
I’ve chosen a thin silver polyester one (sparkly top bought at secondhand shop with doll sewing in mind), it provided some sparkle, complimented aluminium tin box very well and was thin enough to fit over my inserts without obstructing closing.
Sew together on 3 sides, insert stiffener and padding, sew the remaining side closed.
Put inside your case. Enjoy.

Result
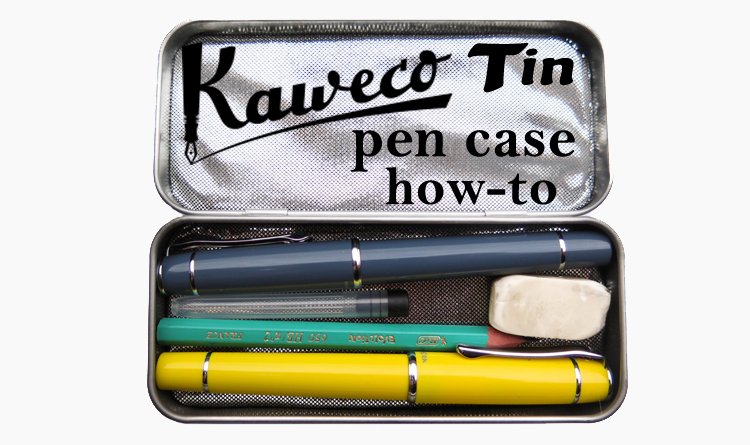
Kaweco tin used as pen case allows storage for 3 pens no taller than 12cm (4.7 inches, length of Pilot Prera capped) if placed straight.
Fewer pens allow to stash some extras: I went with a pencil, eraser and 2 sealable Majohn cartridges (made to Pilot standard).
Resulting pen case is very compact, sturdy and can take a beating instead of your pens!