Model by: kuzzzma
Created for / Создано для: fandom Terror 2019
Difficulty / Сложность: ★★☆☆☆ (2/5)
Time / Время: 1 hour / час
Links: AO3 | Tumblr | Twitter
Пожалуйста не перезаливайте файл куда-либо, а ссылайтесь на этот пост с превью (статистика по скачиванию – это единственный фидбек, который мне достается).
DON’T REUPLOAD PDF files, please link to this post with preview only (number of downloads is the only feedback I usually get)!
This work is licensed under a Creative Commons Attribution-NonCommercial-ShareAlike 4.0 International License.
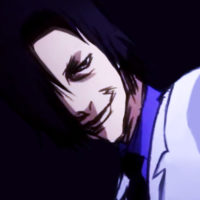
This is a papertoy of Cornelius Hickey, caulker’s mate from HMS Terror, as played by Adam Nagaitis in the first season of “The Terror” TV-series.
This version shows him in his almost nude look from later in the series.
Бумажная фигурка Адама Нагатиса в роли Корнелиуса Хикки из первого сезона сериала Террор. Данная версия представляет его в полураздетом виде из нескольких сцен в финале сериала.
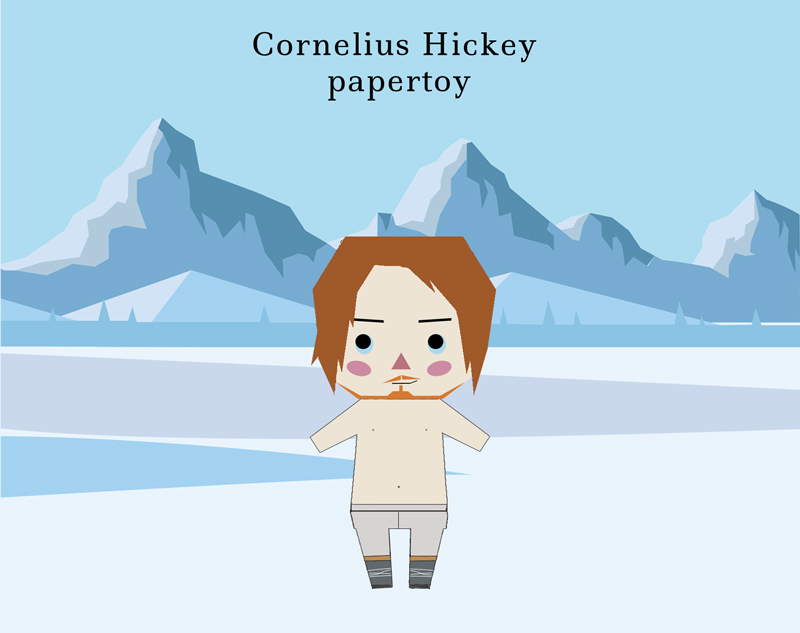
Cornelius Hickey papertoy (almost nude version)
 Preview of Cornelius Hickey (almost nude version) papertoy template
(not suitable for printing, get PDF instead)
Download PDF:
How-to build:
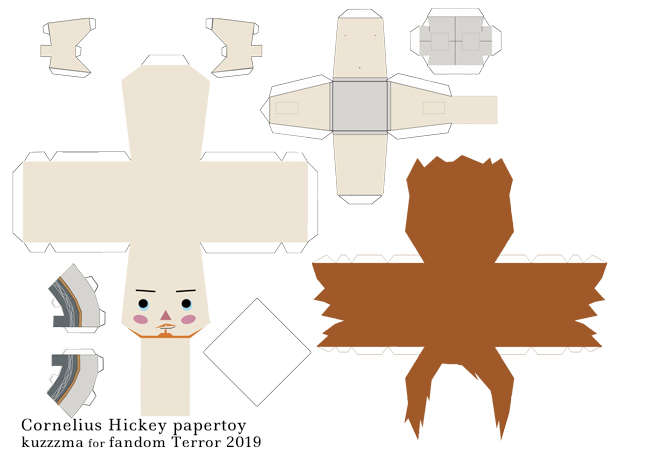
 pic. 1 – How-to build Cornelius Hickey papertoy
English instructions
- Print your model on A4 paper (can be printed on legal paper too with some scaling). I prefer paper with thickness of 120gsm, but regular office paper works too (for the info – it’s 80gsm thickness).
-
Get a good glue. Usually PVA glue is recommended for papercraft, but in some parts of the world getting a decent PVA glue is unexpectedly tricky – a normal liquid clear glue is fine too. Glue in a stick won’t work though – details of paper toys are too small to use it. I prefer to apply glue with wooden toothpicks.
- I recommend scoring future fold lines on the uncut page (indicated on how-to pic.1) with pointed but blunt instrument (empty pen, knitting needle…)
- Then cut all the details, as some details are small – you may have to use smaller scissors.
- Fold all pieces, using guide above as reference (pic. 1).
- Assemble Head, put it aside.
- Assemble Hair piece.
- Assemble main Body.
- Assemble both Top of the Legs.
- Assemble both Legs.
- Assemble both Hands.
- Assemble Coat.
- Assemble figure Stand.
-
TIP: If you want your paper toy to look really polished and tidy – carefully colour white edges of the papertoy in corresponding colours (or in black). I also colour inside of coat. Any paint or marker can be used. This instantly elevates figure and also can be used to hide any build imperfections.
- Time to put it all together. Recommended order:
- Glue Top of the Legs to the main Body.
- Glue Legs to the Top of the Legs.
- Glue Hands to the sides of the Body.
- Glue assembled figure Body to figure Stand.
- Fit Hair over the head and glue it to Head.
- Glue assembled figure Head to the Body.
- All done!
 pic. 2 – Инструкция по сборке бумажной фигурки Корнелиуса Хикки
Русская инструкция
- Распечатываем выкройку бумажной фигурки на листе A4.
Можно использовать обычную офисную бумагу (80gsm), но для лучшей сохранности я предпочитаю более плотную: матовую, толщиной от 120gsm. -
Клей: для пейперкрафта обычно советуют клей на основе ПВА, но в последнее время найти хороший ПВА клей стало сложно (они просто не клеят!). Подойдет и обычный прозрачный канцелярский. Клей в стиках не подойдет – детали слишком мелкие. Я предпочитаю наносить клей зубочисткой – удобно, аккуратно и никакой уборки после. Ей же очень удобно прижимать детали друг к другу в труднодоступных местах (внутри головы особенно).
- Намечаем линии сгиба на неразрезанном листе (см. pic 2) – это можно сделать непишушей ручкой, спицей, другим инструментом, который не порвет бумагу.
- Вырезаем все детали.
- Сгибаем детали по всем намеченным линиям.
- Склеиваем Голову, откладываем.
- Склеиваем Волосы.
- Склеиваем основное Тело.
- Склеиваем Верх Ног.
- Склеиваем Ноги.
- Склеиваем те Руки.
- Склеиваем Подставку.
-
Для более аккуратного вида рекомендую прокрасить все боковые элементы и стыки подходящим по цвету маркером/краской, это скроет белый цвет бумаги и существенно улучшит внешний вид. Если вы используете толстую бумагу – это особенно актуально!
- После того, как все элементы готовы – приступаем к финальной сборке.
- Рекомендуемый порядок сборки:
- Приклеиваем Верх Ног к Телу.
- Приклеиваем Ноги к Верху Ног.
- Приклеиваем Руки к Телу.
- Устанавливаем Тело на Подставку.
- Надеваем Волосы на основной объем Головы и приклеиваем их к верхней площадке головы.
- Приклеиваем собранную Голову к Телу.
- Все готово!