Below are detailed instructions on how to build papertoy of Jonathan Ferguson, with photos.
Download PDF:

How-to build this papertoy
English instructions
- Print your model, usually it takes only 1 or 2 pages of A4 paper (can be printed on legal paper too with some scaling).
I prefer matte photo paper with thickness of 120gsm, but regular office paper works too (for the info – it’s 80gsm thickness). - Assemble tools:
- Papertoy printout
- Cutting tools: scissors, and as there are some very small details – you may have to use smaller scissors or a hobby knife for those.
- Ruler and a scoring tool of your choice (pointed but blunt instrument like empty pen, knitting needle…)
- Glue + toothpicks for applying it.
- Pincer, for holding\pressing together small parts.
- Cutting mat, if needed.
Get a good glue. Usually PVA glue is recommended for papercraft, but in some parts of the world getting a decent PVA glue is unexpectedly tricky – a normal liquid clear glue is fine too. Glue in a stick form won’t work though – details of paper toys are too small to use it.Don’t use crafting tools without owner’s permission!
Don’t take a knitting needle from a ongoing knitting project!
Don’t use any small scissors you’ve found – they could have very specific use, paper can dull them.
You may learn unexpectedly just how expensive sewing scissors are.Author is not responsible for loss of life and limb, damage to health, property or relationships if user fails to adhere to these recommendations. Legal, financial and moral responsibility lies with the user.
- I recommend scoring future fold lines on the uncut page (indicated on pic.3) with a some pointed but blunt tool. This allows for easier folding, and gives figure clean finish.
Use ruler for long straight lines. Test selected tool and pressure you’re applying on some part of the papertoy, that you’re not going to use.
Consult pic. 3 for where to score and fold. - Decide what look do you want – with or without jacket, which shirt – this means you have to choose what colour hands to use with your papertoy.
- Cut all parts.
- Fold all pieces, using guide in pic. 3 as reference once again.
- Assemble main body. Use toothpicks to apply glue to flaps.
- There is an “extra body piece” that goes to close the gap between legs (seen above on pic. 6) – it can be challenging it glue in (I use pincers to hold it in place), but it can be skipped and your figure will still look great.
- Assemble both hands (choose colour depending on preferred look), put them aside.
- Assemble head, put it aside.
- Glue front piece of hair to it’s back part (back to back, white to white). Back part is made larger intentionally, to allow some margin of error here. Trim this excess paper. Put aside.
- Assemble figure stand.
-
TIP: If you want your paper toy to look really polished and tidy – carefully colour white edges of the papertoy in corresponding colours (or in black). I also colour inside of coat. Any paint or marker can be used. This instantly elevates figure and also can be used to hide many build imperfections.
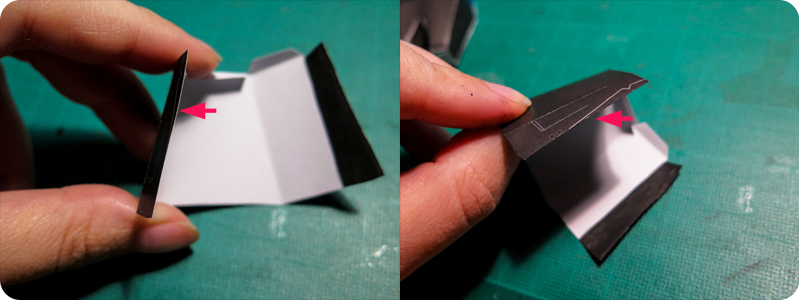
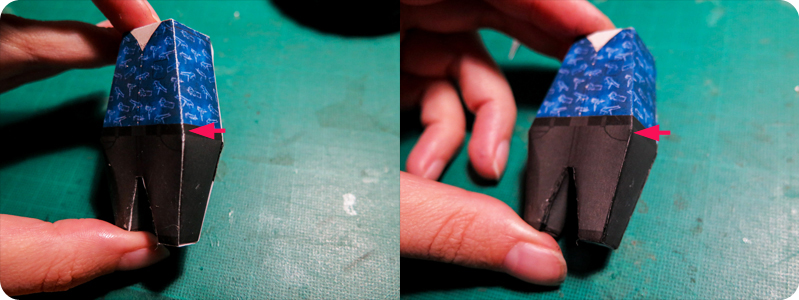 pic.8-9 Effect of colouring the edges
- Time to put it all together.
Glue body to figure stand.
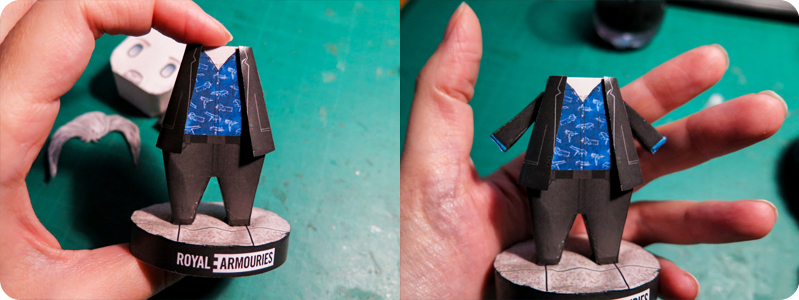 pic.10 Body, jacket and hands are assembled
 - If you’re using alternative shirt – glue it over the front of the body, onto the existing default one.
- If you don’t want to use jacket – attach hands directly to the body and skip next two steps.
Good position for hands – 0,5cm (0.2 inch) from the neck on the sides of the body. - Glue jacket over the body, so it drapes the body.
- Glue in corresponding hands to the jacket.
Good position for hands – 0,5cm (0.2 inch) from the neck on the sides of the body. - Glue in extra piece of hair to the head. It’s designed to stand out at the top over the main head piece, the “back” part attaches to the front of the face plate, “front” part faces the viewer. Put glue only on the top edges of the face plate (zone indicated in blue on how-to pic.3).
- Glue head to the body.
- Glue accessories you want to use – back to back and then onto your figure.
- All done!
 pic.1 Tools
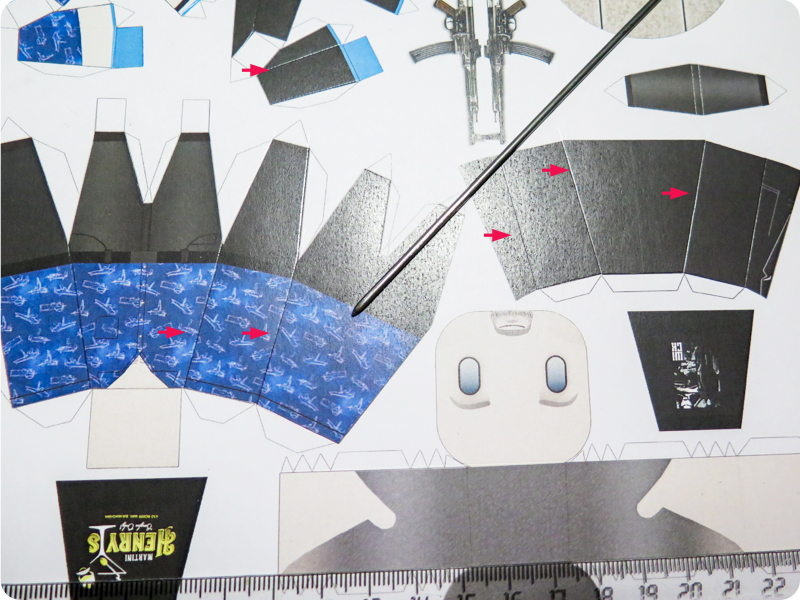 pic.2 Scoring lines
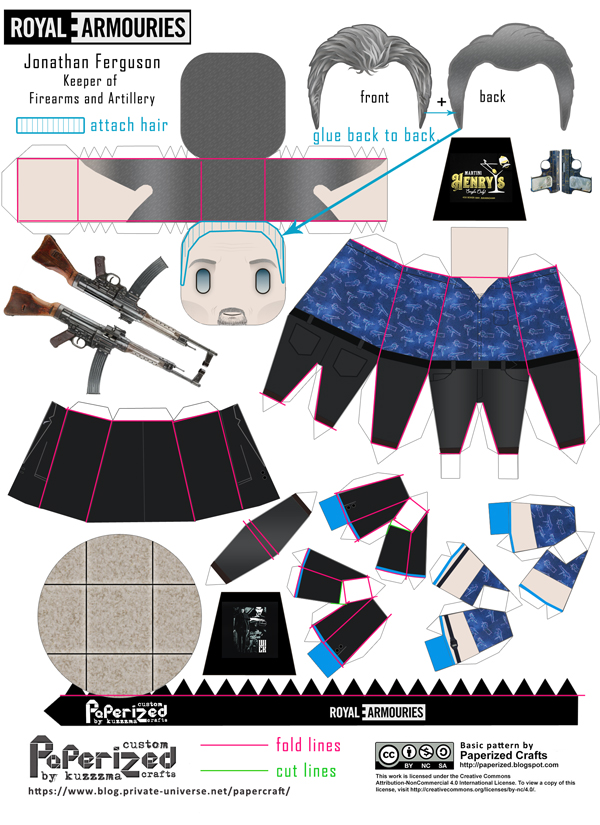 pic.3 How-to: lines to score and fold
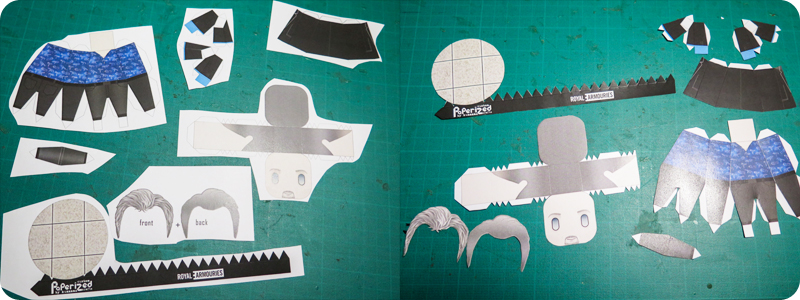 pic.4 Cutting out parts
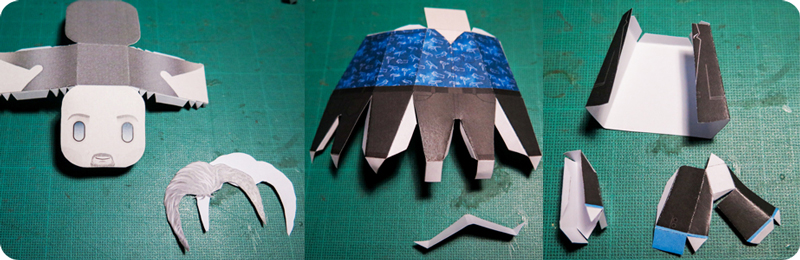 pic.5 Folding parts
 pic.6 Start to glue parts together.
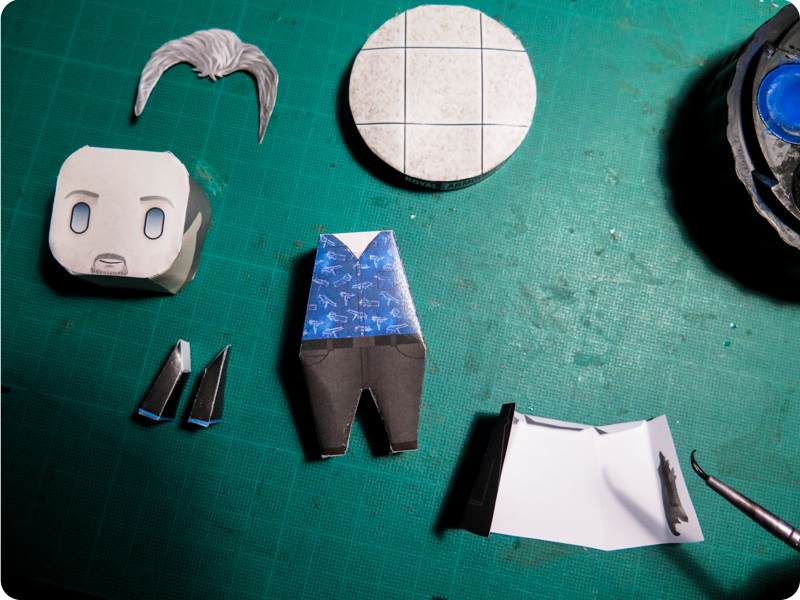 pic.7 All parts done + Colouring inside the jacket
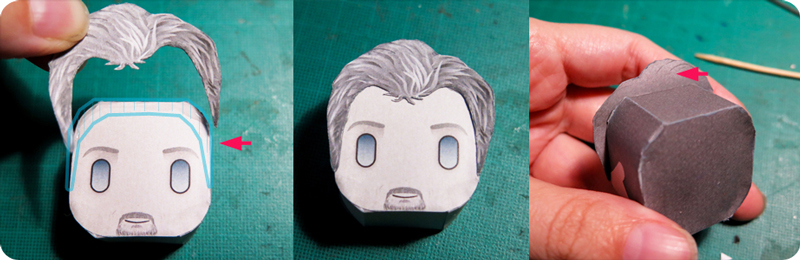 pic.11 Head and hair, note where to apply glue and how hair is sticking out.
 pic.12 Finished papertoy
Русская инструкция
- Распечатываем выкройку бумажной фигурки на листах A4.
Можно использовать обычную офисную бумагу (80gsm), но для лучшей сохранности я предпочитаю более плотную: матовую, толщиной от 120gsm. - Собираем необходимые инструменты (pic. 1):
- Распечатка
- Ножницы и/или скальпель. Имеет смысл взять еще что-то подходящее для вырезания мелких деталей.
- Линейка и что-то для намечания линий сгиба (спица, непишущая ручка…)
- Клей и зубочистки для его нанесения
- Пинцет, для удержания и прижимания мелких деталей.
- Коврик для резки, при необходимости.
Клей: для пейперкрафта обычно советуют клей на основе ПВА, но в последнее время найти хороший ПВА клей стало сложно (они просто не клеят!). Подойдет и обычный прозрачный канцелярский. Клей в стиках не подойдет – детали слишком мелкие.Не берите чужие крафтовые инструменты или материалы без разрешения
Не вытаскивайте спицу из вязания!
Не используете первые найденные в доме маленькие ножницы – бумага может их затупить и вы нарветесь на скандал.Автор снимает с себя ответственность за ущерб нанесенный здоровью, собственности и отношениям, в случае если пользователь не последовал этим рекомендациям. Юридическая, финансовая и моральная ответственность лежит исключительно на пользователе инструкции.
- Намечаем линии сгиба на неразрезанном листе (см. pic. 2-3) – это можно сделать непишушей ручкой, спицей, другим инструментом, который не порвет бумагу. Для длинных линий лучше использовать линейку.
- Вырезаем все детали. (pic. 4)
- Сгибаем детали по всем намеченным линиям. (pic. 5)
- Склеиваем основное тело.
Дополнительная деталь вклеивается последней и закрывает собой дырку в тушке между ног. Вклеивать ее не очень удобно (издержки дизайна), я пользуюсь пинцетом для удержания детали. Эта деталь НЕОБЯЗАТЕЛЬНА и может не вклеиваться – внешний вид фигурки от этого сильно не пострадает. (pic. 6) - Решаем какую версию будем собирать: какая рубашка или пиджак? В зависимости от этого склеиваем нужные по цвету ручки.
- Склеиваем голову, откладываем.
- Приклеиваем перед волос к задней части волос (белое к белому). Обрезаем лишнее – деталь задника волос сознательно сделана чуть шире, чтобы дать пространство для маневра при склейке.
- Склеиваем подставку.
- Окрашивание торцов и стыков (pic. 7-8-9):
Для более аккуратного вида рекомендую прокрасить все боковые элементы и стыки подходящим по цвету маркером/краской, это скроет белый цвет бумаги и существенно улучшит внешний вид. Если вы используете толстую бумагу – это особенно актуально!
- После того, как все элементы готовы – приступаем к финальной сборке.
- Устанавливаем тело на подставку.
- Если используется альтернативная рубашка-футболка. то приклеиваем выбранную поверх дефолтной.
- Если собираем версию в пиджаке – приклеиваем его к телу поверх рубашки к шейной площадке.
- Приклеиваем подходящие руки к телу (или напрямую к пиджаку) (рекомендуемая позиция для рук – 0.5 см от шеи) (pic. 10)
- Приклеиваем задник волосы к лицевой части. Волосы сверху выступают над головой (pic. 11), поэтому наносите клей ТОЛЬКО по краю лицевой части! (зона нанесения клея обозначена синим на pic. 3)
- Приклеиваем голову к телу.
- Собираем желаемые аксессуары и добавляем их к фигурке.
- Все готово!