Diorama for J. Robert Oppenheimer paper toy.
Custom model by: kuzzzma
Difficulty / Сложность: ★★☆☆☆ (2/5)
Paper / Бумага: I prefer Matte photo paper 120gsm
Time / Время: 1 hour / час
How-to assemble: Instructions below, in English and Russian.
Links: A03 | Twitter post | Tumblr post
Custom model by: kuzzzma
Difficulty / Сложность: ★★☆☆☆ (2/5)
Paper / Бумага: I prefer Matte photo paper 120gsm
Time / Время: 1 hour / час
How-to assemble: Instructions below, in English and Russian.
Links: A03 | Twitter post | Tumblr post
DON’T REPOST PDF files, please link to this post with preview only!

This is a reversible diorama for J. Robert Oppenheimer papertoy, it was inspired by a promotional image for film Oppenheimer (2023) & famous photos of aftermath of Hiroshima and Nagasaki bombing and are intended to serve as a reminder

Photos:

More photos in “Oppenheimer papertoys” album.
If you build it – please sent me a photo or give me a link in comments (or via Twitter @kuzzzma or Instagram @kuzzzma_papercraft DM).
It’s the best feedback.
Download PDF:
 Diorama template preview for Oppenheimer papertoys
How-to build this papertoy
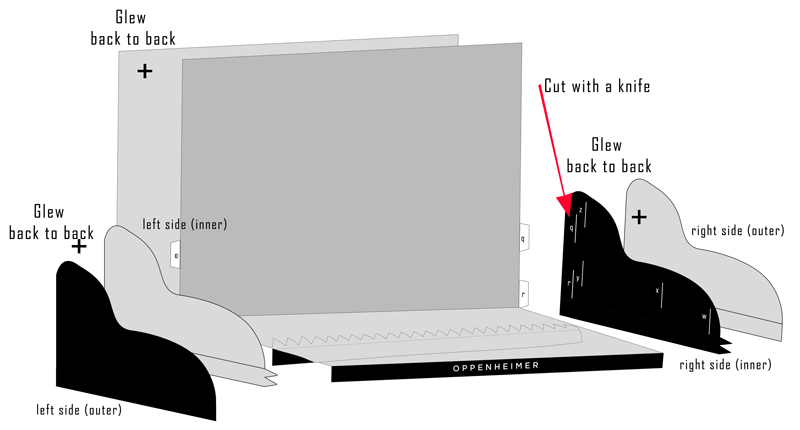 pic.1 How-to: lines to fold
English instructions
- Print diorama, first 3 pages are must-have, 4th pages allow for alternative display of aftermath. Use A4 paper (can be printed on legal paper too with some scaling). I prefer matte photo-paper with thickness of 120gsm, regular office paper might work too, but it might be floppy – consider backing int with some cardstock.
-
Get a good glue. Usually PVA glue is recommended for papercraft, but in some parts of the world getting a decent PVA glue is unexpectedly tricky – a normal liquid clear glue is fine too. Glue in a stick won’t work though – details of paper toys are too small to use it. I prefer to apply glue with wooden toothpicks.
- I recommend scoring future fold lines on the uncut page with pointed but blunt instrument (empty pen, knitting needle…)
- Cut out all the details, as some details are small – you may have to use smaller scissors.
- Fold all pieces, using guide above as reference.
- Assemble left and right sides by gluing them back to back (see pic. 1)
- Cut indicated lines on side pieces with an x-acto knife.
- Cut indicated lines on the stand surface with an x-acto knife.
- Assemble stand base, by gluing it to side pieces as indicated on pic. 1.
- Glue back part to one another.
- To assemble diorama – match white flaps with letters to lines on stand and sides. Put flaps through slits one by one.
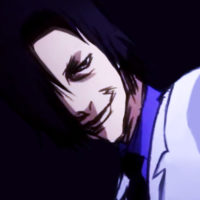
- Put Oppenheimer figure amidst the flames.
Русская инструкция
- Распечатываем выкройку диорамы на листах A4. Я предпочитаю более плотную: матовую, толщиной от 120gsm. Обычная офисная бумага для данной диорамы может не подойти – можно продублировать шатающиеся детали картономю
-
Клей: для пейперкрафта обычно советуют клей на основе ПВА, но в последнее время найти хороший ПВА клей стало сложно (они просто не клеят!). Подойдет и обычный прозрачный канцелярский. Клей в стиках не подойдет – детали слишком мелкие. Я предпочитаю наносить клей зубочисткой – удобно, аккуратно и никакой уборки после. Ей же очень удобно прижимать детали друг к другу в труднодоступных местах (внутри головы особенно).
- Намечаем линии сгиба на неразрезанном листе – это можно сделать непишушей ручкой, спицей, другим инструментом, который не порвет бумагу.
- Вырезаем все детали.
- Сгибаем детали по всем намеченным линиям.
- Собираем боковые детали, склеивая их между собой с изнанки (см pic. 1)
- Теперь прорезаем на боковых деталях отмеченные линии ножом.
- Прорезаем на стенде отмеченные линии ножом.
- Собираем стенд, приклеивая боковые детали, как на pic. 1.
- Готовим задник – приклеиваем 2 части спинка к спинке.
- Для сбора диорамы – вставляем отмеченные буквами белые табы в прорези с такими же буквами. Я рекомендую двигаться от задника к передней части, по мере уменьшения деталей.
- Размещаем фигурку Оппенгеймера среди пламени..